Sepulcher is one of the five fastest Lost Sectors in Destiny 2. With Gjallarhorn, the Sepulcher Lost Sector can be cleared in 2 to 5 minutes with very little difficulty.
While our Master Lost Sectors guide features every Legend and Master Lost Sectors in the game, this Sepulcher mini-guide covers everything you need to know to prepare, including recommended loadouts, enemy shields, and Champions.
Sepulcher Location and Requirements
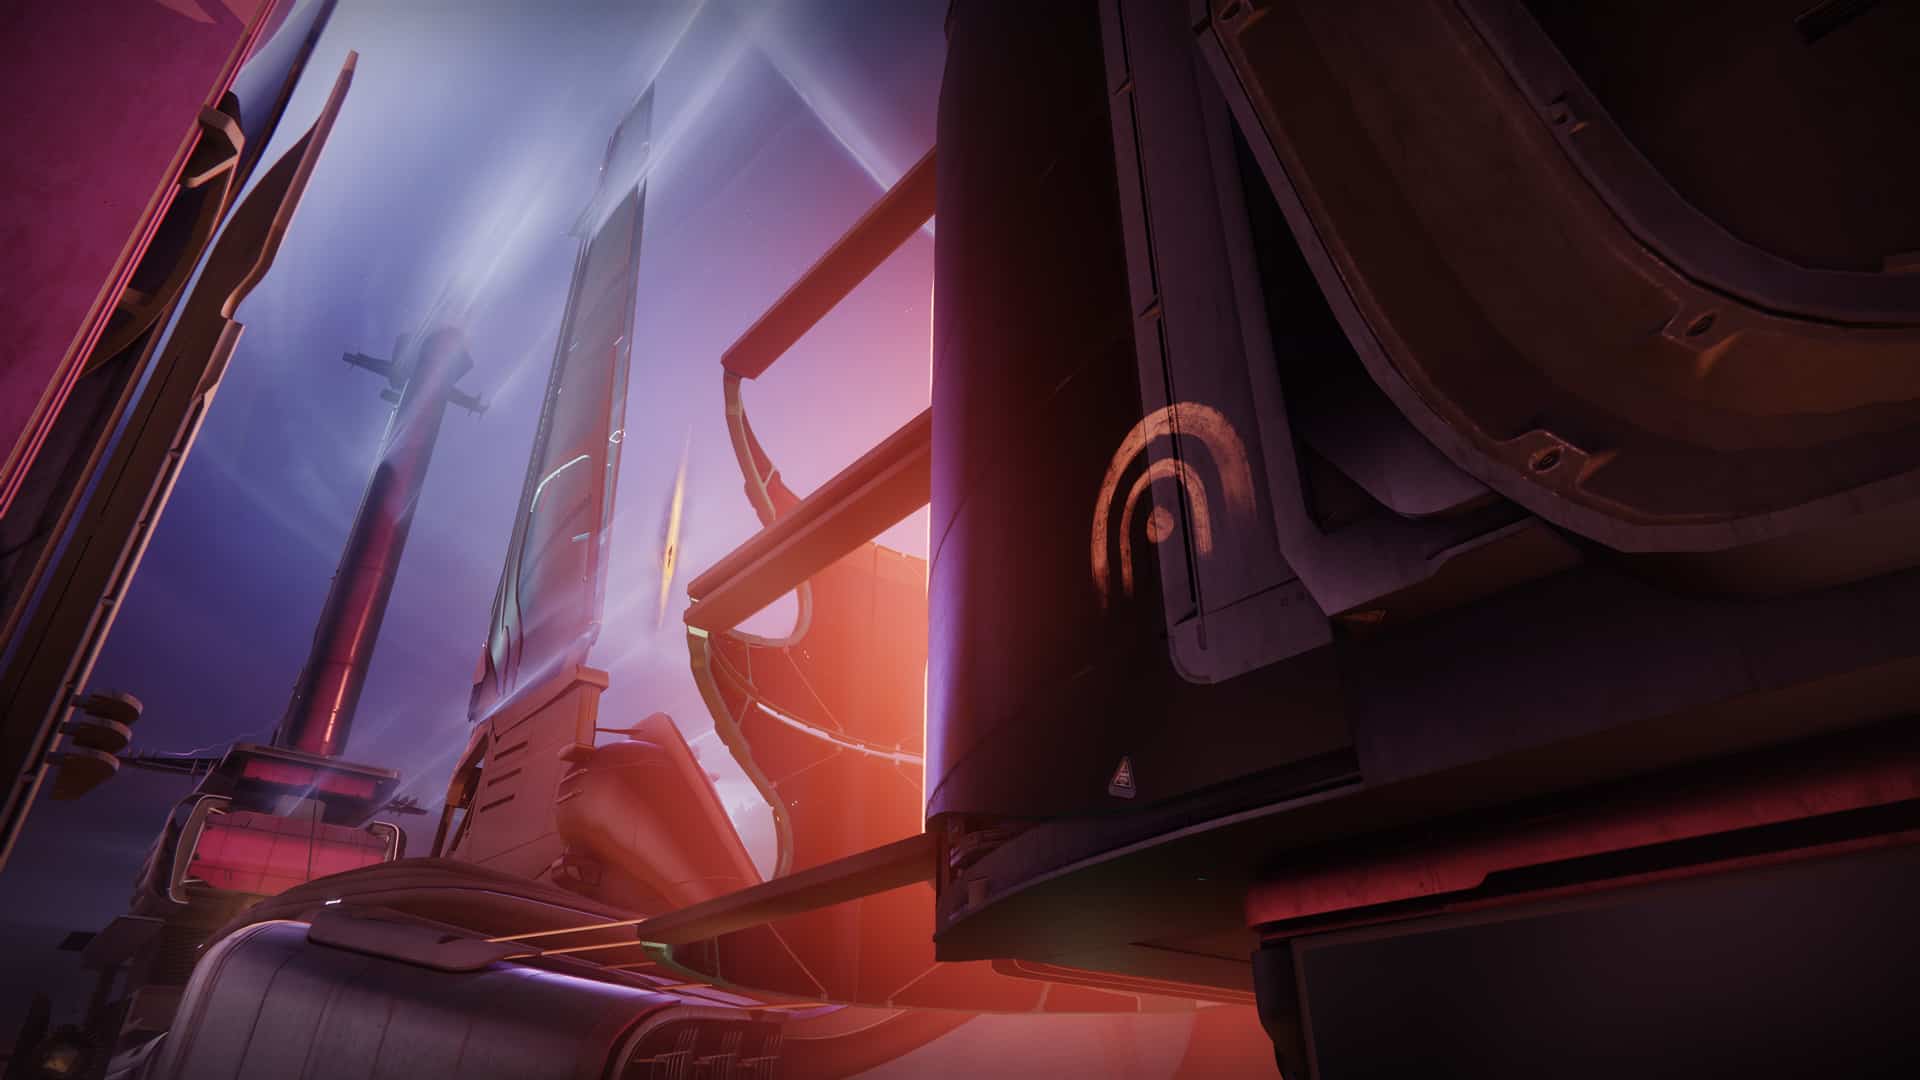
The Sepulcher Lost Sector is located in The Florescent Canal, on the Throne World.

Sepulcher Lost Sector location
How to unlock Legend & Master Lost Sectors? You’ll need to complete the normal version of the Lost Sector and reach 1510 Power Level to even see them in the Director.
Sepulcher rotation
Seasonal rotation
| Date | Lost Sectors | Location | Reward | Threat | Surges | Week # |
Shields & Champions
This is an overview of what Shields and Champions you should expect in this Lost Sector:
| Lost Sector | Location | Threat | Tier | Shields | Champions |
These are the types of Champions you’ll have to deal with:
| Sepulcher Champions |  |
 |
| Legend | x1 Unstoppable Ogre | x3 Barrier Knight |
| Master | x2 Unstoppable Ogre | x5 Barrier Knight |
Sepulcher Modifiers: Legend & Master
Legend Modifiers:
- Solar Burn: +50% Solar damage dealt and received.
- Hot Knife: Shanks now have Solar shields.
- Equipment Locked: You will not be able to change your equipment after this activity starts.
- Match Game: Enemy shields are highly resistant to all unmatched elemental damage.
- Limited Revives: Limited fireteam revives. Gain additional revives by defeating Champions.
- Shields Foes: You will face combatants with Solar and Void shields.
- Champion Foes: You will face Barrier and Overload Champions.
- Arach-NO!: When defeated, Fallen Vandals spawn a web mine at their feet.
Master Modifiers:
- All of the above, plus
- Fire Pit: When defeated, Acolytes spawn fire pools that cause damage over time.
Difficulty: Sepulcher is one of the five fastest Lost Sectors in Destiny 2.
Recommended loadout

Weapons & Armor
| Art | Weapon | Type | Archetype | Rarity | Ammo? | Element? | Requirements | In loot pool? | Ammo | Element | Tier | Excels | Source | Craftable? | Requires | Released | Slot | Can be Crafted? | Best of? | Top Perk? |
|---|---|---|---|---|---|---|---|---|---|---|---|---|---|---|---|---|---|---|---|---|
 | Gjallarhorn | Rocket Launcher | Exotic | Exotic | Heavy | Solar | 30th Anniversary | Yes | Best ❘ S | PvE + PvP | Grasp of Avarice Dungeon | 30th Anniversary | 30th Anniversary event | Heavy | No | Top-tier | ||||
 | Pardon Our Dust | Grenade Launcher | Lightweight | Legendary | Special | Kinetic | Free-to-Play | Yes | Strong ❘ A | PvE | Dares of Eternity | Free-to-Play | 30th Anniversary event | Kinetic | Craftable | Top-tier | ||||
 | BxR-55 Battler | Pulse Rifle | Legacy PR-55 | Legendary | Primary | Solar | Free-to-Play | Yes | Best ❘ S | PvE + PvP | Dares of Eternity | Free-to-Play | 30th Anniversary event | Energy | Craftable | Top-tier | Incandescent |
This season, the best loadout is:
- Pardon Our Dust
- BXR-55 Battler
- Gjallarhorn (or Xenophage)
- A Solar 3.0 Build
The majority of your ad clear in the Sepulcher Lost Sector will be with your Solar abilities and with Gjallarhorn. Your Solar abilities will create Solar Wells that will buff the damage from the BXR and Gjallarhorn.
Use your legendary grenade launcher to deal with Unstoppable Champions. The BXR and everything else in the recommended loadout will take care of the rest of the Lost Sector.
With Rocket Launcher ammo mods on your armor, you only need one Gjallarhorn rocket per Champion. The extra rockets go towards quickly killing a wave of enemies and the final boss.
Pro Tip: All of these weapons are very strong with a Solar 3.0 build. Weave a Solar 3.0 ability into your Solar weapons to make the Lost Sector easier for yourself.
Essential Mods
Make sure to equip these mods for easy runs:
| Art | Mod Name | Slot | Cost | Requirements | Effects | Type |
|---|---|---|---|---|---|---|
 | Harmonic Siphon | Helmet | 1 | Rank 6 | Rapid final blows with weapons matching your Subclass create an Orb of Power. | General |
 | Anti-Barrier Pulse Rifle | Arms | 1 | None | Pulse Rifles you are wielding fire shield-piercing rounds and stun Barrier Champions (also deal bonus damage to Barrier Champions). | Champions |
 | Recuperation | Legs | 1 | Rank 5 | Replenishes health each time you pick up an Orb of Power. | General |
Requirements
| Difficulty | Legend | Master |
| Recommended Power | 1580 | 1610 |
| Exotic armor (if solo) | Rare | Common |
Needless to say, these aren’t easy, and the least you should do is ensure you have a reasonable Power Level. By reasonable, we mean no less than 10 Power Levels below the recommended levels. If you find yourself struggling, work on increasing your Power Level as much as possible and focus on Legend Lost Sectors.
Sepulcher Lost Sector guide
Sepulcher is a really fast Lost Sector, but it’s easy to get surrounded by enemies. The Lost Sector is very close and confined with enemies spawning from multiple locations.
At the beginning of the Lost Sector, you’re stopped in an open room with almost no cover. In this room, enemies spawn from the left and right corners of the room.
Normally, this room can be difficult with all of the Solar abilities coming your way. What makes it easy is if you kill everything as they spawn.

Use your Solar abilities on one corner and Gjallarhorn on the other corner. One well-placed Solar Grenade and Gjallarhorn can kill almost every enemy that spawns.
In the final two rooms of the Sepulcher Lost Sector, there are a lot of enemies grouped up together. If it feels like there are too many enemies for you, use your Solar 3.0 abilities first.
This should clear away a good amount of enemies for you. If it’s not enough, the BXR and Gjallarhorn will make quick work of the rest.

BxR-55 Battler Solar Legendary Pulse Rifle
One especially annoying thing about the Sepulcher Lost Sector is how many Lucent Moths will attack you. They do a lot of damage if they get near you. It’s really easy to kill yourself if you shoot it when it’s too close.
Keep a look out for these Lucent Moths and shoot them when as soon as they spawn. If you kill them early, their explosions will kill enemies for you. You’ll save a ton of ability energy and ammo this way.
More Lost Sector Guides
| Lost Sectors | Location | Burn | Legend - Shields | Legend - Champions | Master - Shields | Master - Champions |
|---|---|---|---|---|---|---|
| The Conflux | Nessus | | |
|||
| The Rift | Nessus | |||||
| Extraction | Throne World | |||||
| Metamorphosis | Throne World | |||||
| Sepulcher | Throne World | | |
|||
| K1 Communion | Moon | |||||
| K1 Crew Quarters | Moon | |||||
| K1 Logistics | Moon | |||||
| K1 Revelation | Moon | | |
|||
| Bunker E15 | Europa | |||||
| Concealed Void | Europa | |||||
| Excavation Site XII | EDZ | | |
|||
| Skydock IV | EDZ | | |
|||
| The Quarry | EDZ | | |
Lost Sector Rewards
As a reminder, completing Legend or Master Lost Sectors solo is the only way to acquire several specific Exotic armor pieces. While our Lost Sector Exotics guide covers them all, including their rotation for the remainder of the season, these are all Lost Sector Exotics available today:
Lost Sector Exotics today
| Date | Lost Sectors | Location | Threat | Week # | Shields | Champions | Reward |
|---|---|---|---|---|---|---|---|
| 6/11/2023 | Bay of Drowned Wishes | Dreaming City | Week 3 | Arms |
| Date | Name | Armor | Class | Type | Requires | Exotic Perk |
|---|---|---|---|---|---|---|
| 2024-04-23 | Mothkeeper's Wraps |  Mothkeeper's Wraps | Hunter | Arms | Season 22 | Your grenade becomes a cage of loyal moths that release on impact and fly toward the nearest target or ally. If they reach a target, they detonate in a blinding explosion; if they reach an ally, the moths grant your ally a Void overshield. |
| 2024-04-23 | Athrys's Embrace |  Athrys's Embrace | Hunter | Arms | Beyond Light | Weighted Knife gains a second bounce. Rapid precision hits with your weapons grant Weighted Knife a significant damage bonus, bonus strength, and the ability to stun unshielded combatants for a short time. Empowered Weighted Knife is strong against Unstoppable Champions. |
| 2024-04-23 | Renewal Grasps |  Renewal Grasps | Hunter | Arms | The Witch Queen | Your Duskfield grenades have a much larger effect radius. Allies inside the Duskfield take reduced damage and targets inside the area deal reduced damage. |
| 2024-04-23 | Triton Vice |  Triton Vice | Hunter | Arms | Lightfall | Increases Glaive reload speed and melee damage when surrounded. Glaive melee final blows overflow a round to the magazine. Glaive projectile final blows detonate if the Glaive deals damage matching your subclass type. |
| 2024-04-23 | Caliban's Hand |  Caliban's Hand | Hunter | Arms | The Witch Queen | Your Proximity Knife scorches targets it damages with its explosions, or ignites targets on a direct hit. After throwing a Proximity Knife, you gain increased melee regeneration until the knife explodes. |
| 2024-04-23 | Icefall Mantle |  Icefall Mantle | Titan | Arms | Beyond Light | Stasis final blows have a chance to grant an escalating bonus to Stasis weapon damage. Replaces your Barricade ability with a personal overshield. When you activate your Barricade, you gain the highest-tier Stasis weapon damage bonus and create a burst around yourself that slows combatants. While you have this overshield, you are slowed and Barricade does not recharge. |
| 2024-04-23 | Pyrogale Gauntlets |  Pyrogale Gauntlets | Titan | Arms | Season 22 | Modifies Burning Maul into a single high-damage slam of your hammer that creates five cyclones of flame. Consecration's second slam creates a cyclone of flame. |
| 2024-04-23 | Point-Contact Cannon Brace |  Point-Contact Cannon Brace | Titan | Arms | The Witch Queen | Defeating targets with your Thunderclap melee restores melee energy. Targets near you when you use your Thunderclap suffer lightning strikes and become jolted; being amplified increases the damage of these lightning strikes. |
| 2024-04-23 | Second Chance |  Second Chance | Titan | Arms | The Witch Queen | Gain a second charge of your Shield Throw melee. Your Shield Throw melee now weakens targets and becomes shield-piercing, stunning Barrier Champions. When you stun a Barrier Champion with your Shield Throw melee, you regain a melee charge. |
| 2024-04-23 | No Backup Plans |  No Backup Plans | Titan | Arms | Beyond Light | While using a Void subclass, rapid Shotgun final blows or defeating a powerful combatant with a Shotgun will grant a Void overshield and start health regeneration. While you have a Void overshield, Shotguns deal additional damage, and Shotgun final blows refresh the overshield. Provides a moderate benefit to Shotgun airborne effectiveness and reload speed. |
| 2024-04-23 | Osmiomancy Gloves |  Osmiomancy Gloves | Warlock | Arms | The Witch Queen | Your Coldsnap grenades have an additional charge that recharges quicker on direct impact. The seeker spawned from Coldsnap grenades travels further. |
| 2024-04-23 | Nothing Manacles |  Nothing Manacles | Warlock | Arms | Beyond Light | You gain an additional Scatter Grenade charge. Enables tracking for Scatter Grenade projectiles. |
| 2024-04-23 | Briarbinds |  Briarbinds | Warlock | Arms | Season 22 | Your Void Souls have a longer duration. They also gain escalating damage and durability as they defeat targets. You can retrieve your Void Souls by interacting with them, allowing them to be redeployed. |
| 2024-04-23 | Ballidorse Wrathweavers |  Ballidorse Wrathweavers | Warlock | Arms | Lightfall | Your Winter's Wrath Shockwave deals increased shatter damage. Allies in range of your Shockwave gain an overshield and increased damage with Stasis weapons. |
| 2024-04-23 | Necrotic Grip |  Necrotic Grip | Warlock | Arms | Beyond Light | Damaging combatants envenoms them with poison that deals increasing damage over time. Defeating a poisoned combatant spreads the condition to nearby targets. |
Before you go…
Hopefully, you now have everything you need to know how to farm this Lost Sector. But if you find yourself struggling, take your game to the next level with a top-tier build or one of the best weapons in the game.

0 Comments