Grandmaster Nightfalls are perhaps the most challenging endgame activity in Destiny 2. With an insane Power Level requirement and unforgiving modifiers, Grandmaster Nightfalls will challenge all but the top fireteams out there.
This guide will provide you with everything you need to tackle and conquer the Proving Grounds GM, including loadouts, preferred subclasses, tactics, and more.
| Art | Nightfall | Threat | Shields | Champions | Requires |
Loadout and Subclasses
![]() Updated as of Season of Defiance (S20).
Updated as of Season of Defiance (S20).
The following guide was heavily inspired by Mac‘s excellent video covering all Grandmasters this season.
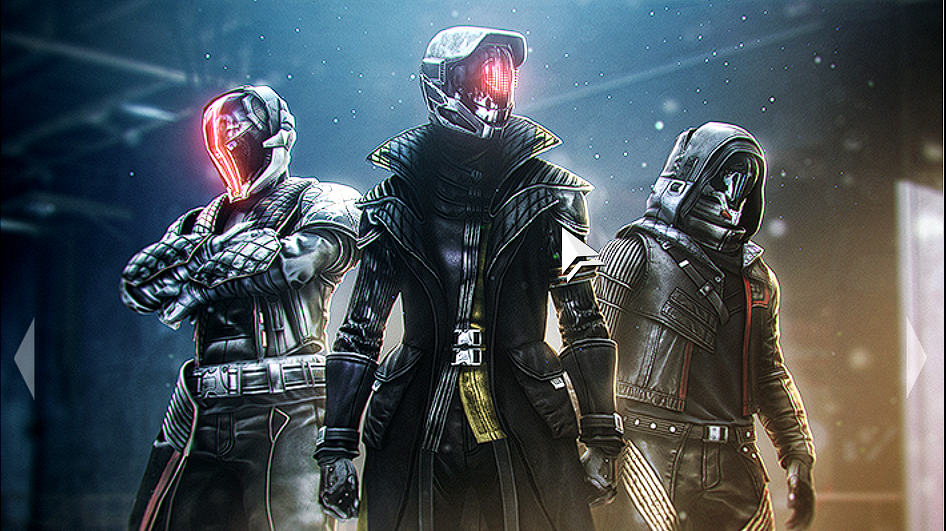
Subclasses & Exotics
For class loadouts, Hunters want to rock an “Invis” Void Nightstalker build with Omnioculus. Warlocks want to spec into Well of Radiance and Phoenix Protocol. And Titans can go with an Arc build and Heart of Inmost Light.
| Armor | Class | Type | Requirements | Source | Released | Requires | Exotic Perk |
|---|---|---|---|---|---|---|---|
 Phoenix Protocol | Warlock | Chest | Forsaken Pack | Exotic Engrams | Season 4 | Forsaken Pack | Exotic Perk: "Kills and assists you make while standing in your Well of Radiance return Super energy." |
 Omnioculus | Hunter | Chest | Beyond Light | Lost Sectors | Season 13 | Beyond Light | Exotic Perk: "You gain a second Smoke Bomb charge and have damage resistance while invisible. When you make an ally invisible, they gain damage resistance while invisible and you gain melee energy." |
 Heart of Inmost Light | Titan | Chest | Forsaken Pack | Exotic Engrams | Season 4 | Forsaken Pack | Exotic Perk: "Using an ability (grenade, melee, or Barricade) empowers the other two abilities. Empowered means abilities have faster regen, melees and grenades do more damage, and Barricades have more hit points." |
Loadout
With Barrier and Unstoppable Champions, all 3 shields, and a Solar elemental singe, loadouts for this GM are simple with all 3 players wanting Arbalest, a Solar Energy Scout Rifle such as the Staccato, and either a Stormchaser or Cataclysm heavy linear fusion rifle.
| Art | Weapon | Type | Archetype | Rarity | Ammo? | Element? | Requirements | In loot pool? | Ammo | Element | Tier | Excels | Source | Craftable? | Requires | Released | Slot | Can be Crafted? | Best of? | Top Perk? |
|---|---|---|---|---|---|---|---|---|---|---|---|---|---|---|---|---|---|---|---|---|
 | Arbalest | Linear Fusion Rifle | Exotic | Exotic | Special | Kinetic | Lightfall | Yes | Best ❘ S | PvE | Exotic Quest | Lightfall | Season 6 | Kinetic | No | Top-tier | ||||
 | Staccato-46 | Scout Rifle | Precision | Legendary | Primary | Solar | Free-to-Play | Yes | Strong ❘ A | PvE | Gunsmith | Free-to-Play | Season 17 | Energy | No | Top-tier | Incandescent | |||
 | Cataclysmic | Linear Fusion Rifle | Precision | Legendary | Heavy | Solar | The Witch Queen | Yes | Best ❘ S | PvE | Vow of the Disciple Raid | Witch Queen | Season 16 | Heavy | Craftable | Top-tier | Bait and Switch | |||
 | Stormchaser | Linear Fusion Rifle | Aggressive | Legendary | Heavy | Arc | Deluxe Edition | Yes | Average ❘ B | PvE | Duality Dungeon | Deluxe Edition | Season 17 | Heavy | No |
As always these are strictly recommendations, so if you have something in mind that you feel would work better, feel free to throw it on. With all that being said, let’s get into the strategy.
Grandmaster Power Level Requirements
If you’re interested in running a GM, you need to have a proper Power Level (including your Artifact’s bonus Power):
| Difficulty | Recommended | Enemies Power Level | Adept drop rate |
| Grandmaster | 1815 | 1840 | Common+ |
For the record, Power Level requirements were drastically reduced this season to allow more players to experience Grandmaster Nightfalls.
Grandmaster Nightfalls in Season 20:
- Proving Grounds
- Battleground – Mars
- Hypernet Current
- The Arms Dealer
- The Glassway
- Lake of Shadows
Proving Grounds GM guide
Entrance
Begin by skipping the first pack of ads and sparrowing up to the left cliffside, taking out the Scorpio turrets as you go up. Next knock down the Barrier colossus and other trash ads, then turn around to drop the unstoppable Incendior at the beginning of the GM. Once you take him out, you can go back towards the tank and drop the rest of the ads, turrets, and final Unstoppable Incendior champion.
Next, take out the trash ads and unstoppable Incendior that spawn from the tank with the miniboss, after which you can damage the miniboss to ½ HP spawning his immune shield and another pack of enemies, including an Unstoppable Incendior on the left side that you can easily spawn trap with nades.
Next, drop the shield by hugging the miniboss to bug him out, rendering him unable to attack. Drop the miniboss and then head inside, dealing with a small pack of ads and then taking the elevator up to the tank room.
Tank Room
Take out the small pack of ads that show up, as well as the 2 Interceptors by shooting their vehicles until they explode from up top. Next, drop down and drop the 2 Psion snipers on the left and right balconies, then utilize your Supers and Linear fusion rifles to take down the 2 Cabal Minibosses and two barrier champions. This is best done by having 1 member of your team call out a target to team shoot it, and working your way through all 4 of these lethal targets 1 by 1.
Be aware that you will also have dogs spawning from left and right about 30 seconds in, so keep an eye out for those. Before you kill every enemy in this phase, make sure you clear all explosive canisters in the bottom middle section, after which you can clean up the rest of this room and then head down there.
Down here, you are completely safe from the tanks as long as you are hugging the door, don’t worry, though, no enemies will come out of here. What you do need to worry about, however is the snipers on the top left and right balconies, as well as the rest of the ads spawning underneath those balconies. Have the whole team chain Supers to drop the 2 Barrier Colossus and other trash ads. Just make sure you have at least 1 player looking at each side at all times so no ads sneak up on you.
Similar to the last phase, after about 30 seconds you will get 3 dogs from each side. After everything is dead you can kill 1 of the tanks which will then spawn everything from the previous wave again, minus the snipers, but with the addition of 2 Minibosses. Don’t worry though, the minibosses won’t push you. Clear out all the ads again, then drop the tank and 2 minibosses and be on your way.
This part is very chaotic but with good super chains, and good team coordination you will stomp it.
Next section
Proceed by making your way through some trash ads, then through an Unstoppable Incendior and Miniboss Incendior or Phalanx, being careful of the Psion sniper on the balcony to your left once you go outside. Once you clear all of these ads you can grab the ball and drop it immediately to go take care of the 3 Gladiators and other trash mobs inside. Minding the 2 Scorpio turrets on the left, drop the Barrier Colossus and 2 Major Legionnaires before dunking the ball.
Next, you can head out to the other side being careful of the Phalanxes, Scorpio turrets in front of you and up on the top left, the Psion sniper directly above you, and the Barrier Colossus and Cabal Centurion or Psion Miniboss. Leave the Miniboss for last, and head over to the same side as it to kill it, since killing him will spawn gladiators back in the center room. Take out those gladiators along with the rest of the trash mobs, and barrier colossus, then dunk the final ball.
Drop all of the ads coming out of the middle including the Barrier Colossus and Unstoppable Incendior, and then take the elevator up to the boss room.
Boss room
For the Boss room play the first 2/3rds of it in the back of the room, it has way more cover and protection than the front does. Just make sure to pop into the oven tunnel whenever Ignovun shoots his fireballs. This tunnel will burn you, but not if you stand on the sides in the middle. The first wave of ads will be 2 Legionaries and a Phalanx on each side that jump from the windows. After killing them, damage the boss to 2/3rd hp which will then spawn an Unstoppable on each side. Drop the Unstoppables and then wait in the oven until he shoots all of his fireballs. He only shoots 13 sets per phase, so you can wait them out before going to break the shield.

After waiting out the fireballs take out the shield generator by having players distract the boss by drawing his aggro as your 3rd goes in for the kill, and then book it to the back again to take out the next waves of Phalanxes and Legionaries from the windows. After this, you can damage the boss to ⅓ hp where you will then book it to the entrance of the arena. Then kite the 2 Unstoppables and burst them down, being careful as they can occasionally bug out and teleport to you.
After you drop both of them, hang back and wait out the fireballs. They can not hit you if you are on the ramp or further back. After the fireballs are done, break the generator by hopping up and down from the platform on the side opposite of the boss to sneak some shots in. Your teammates can relay boss position information to you while you are underneath the platform as well.
Breaking this shield will have the boss chase you anywhere in the arena and spawn the usual 2 Legionnaires and 1 Phalanx from each window. Here you want to pop supers to take out the window ads that spawn, avoiding the boss relentlessly pushing you. The oven as usual is a good spot to play around since he can’t go through it. After neutralizing all of the ads kite the boss as you damage him until he dies.

0 Comments